Basic spelling mistakes look bad and undermine the credibility of your work.
Spending a few minutes spell checking your document is time well spent.
The good news is that checking your spelling in Adobe InDesign is easy. This blog will show you how.
Overview
- How to use the Spell Checker in InDesign
- How to use Dynamic Spelling
- Some useful Spelling preferences to know about
- How to spell check your whole document (instead of just part of it)
- Using Autocorrect
Step by Step Guide
Here's how to do a basic spell check in Adobe InDesign.
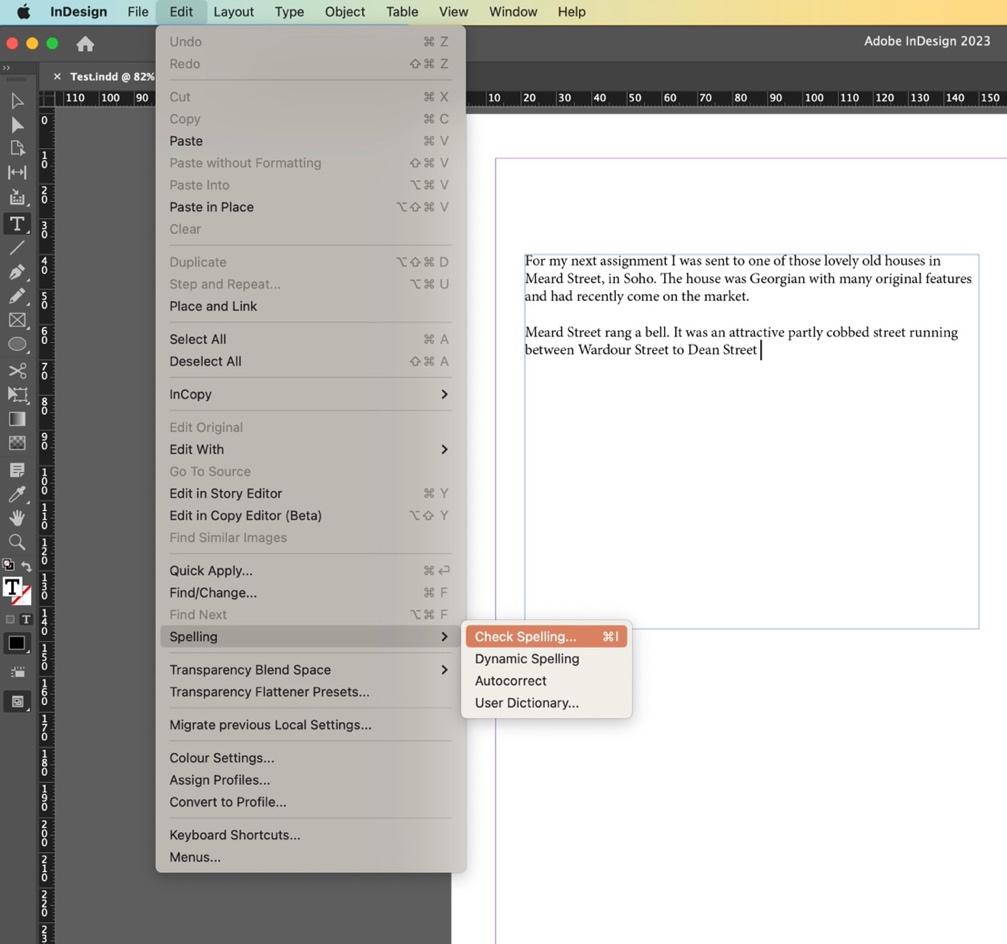
Simply, make sure the correct text box is selected and go to the Edit menu > Spelling > Check Spelling.

InDesign will flag up any words that don't look right. In this case, the word fetures is wrong ‐ it should be features.
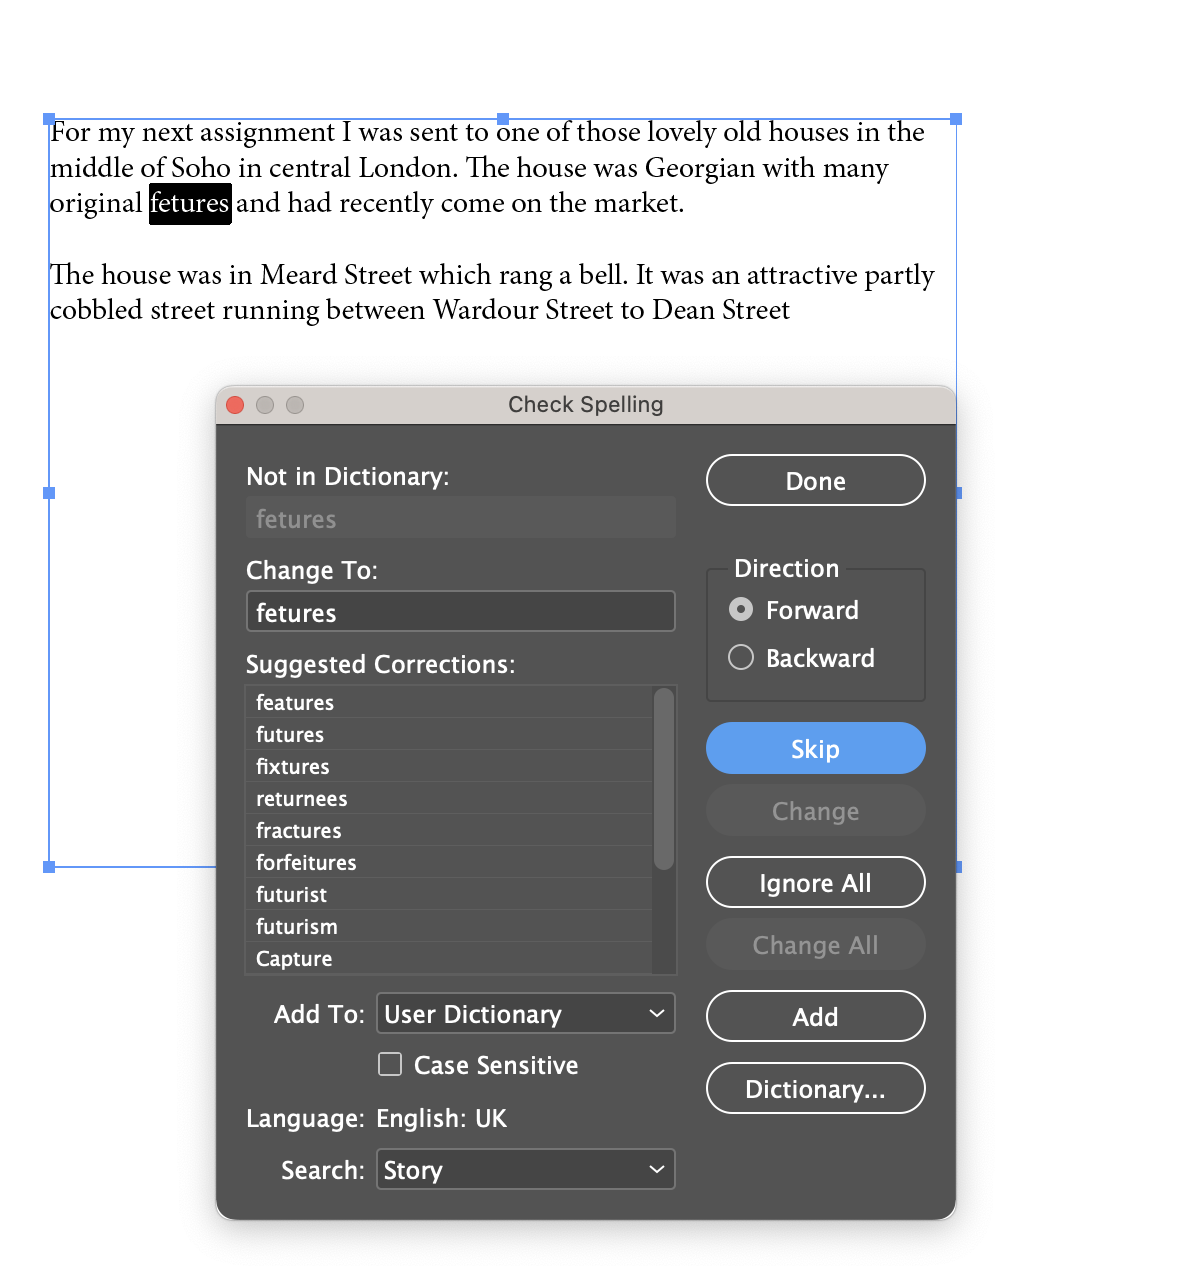
InDesign will suggest corrections. Choose the right one and select Change and InDesign will make the correction.
Sometimes InDesign might flag up a word that it is not sure about but is actually correct.
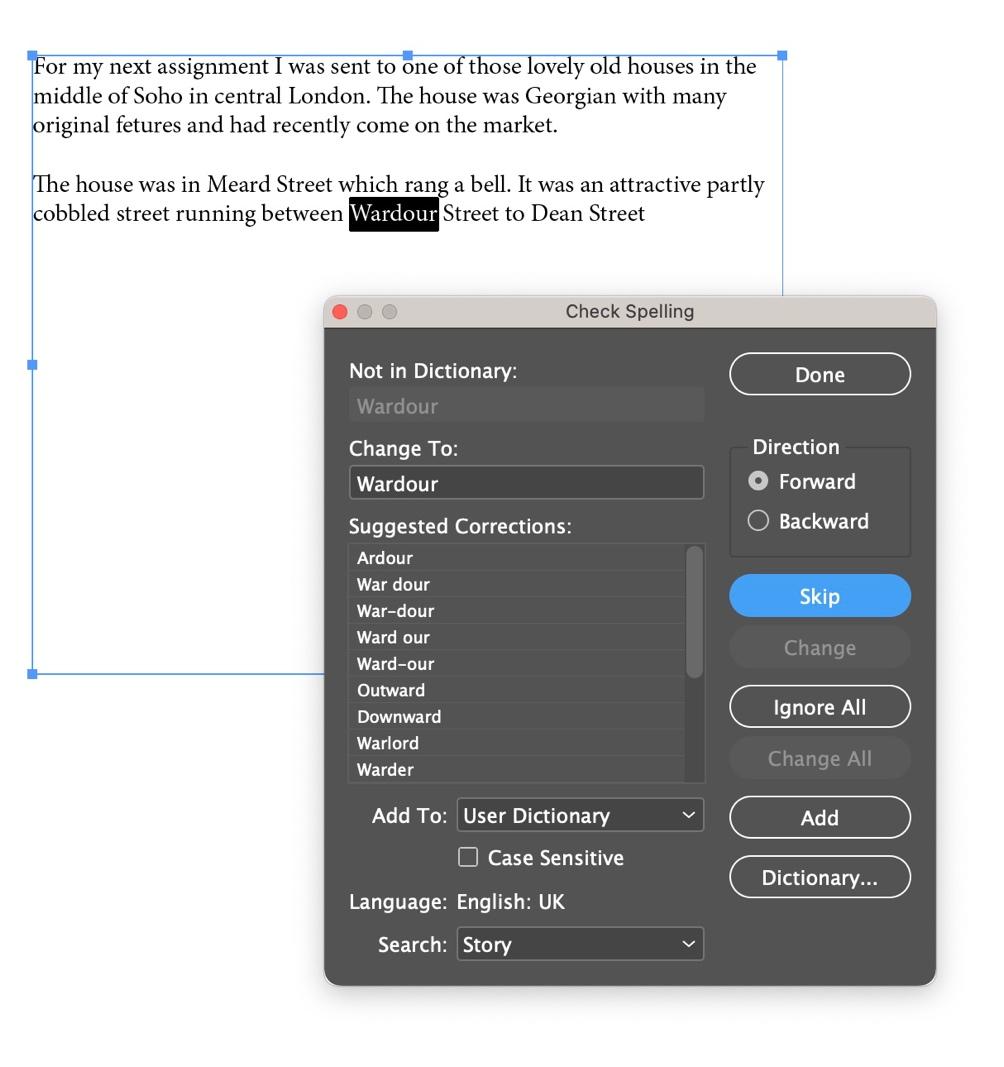
In this case the word Wardour. This is the name of a street and is spelled correctly. In this case just choose Skip and InDesign will move onto the next one.
Keep doing this until all spelling mistakes have been corrected and choose Done.
What happens if I want to spell check my whole InDesign document?
By default, InDesign will only check the spelling in the selected text box. If you want InDesign to check the spelling in your whole document, you can change the option at the bottom of the Spell Check dialog to document. InDesign will now check all unconnected text boxes.
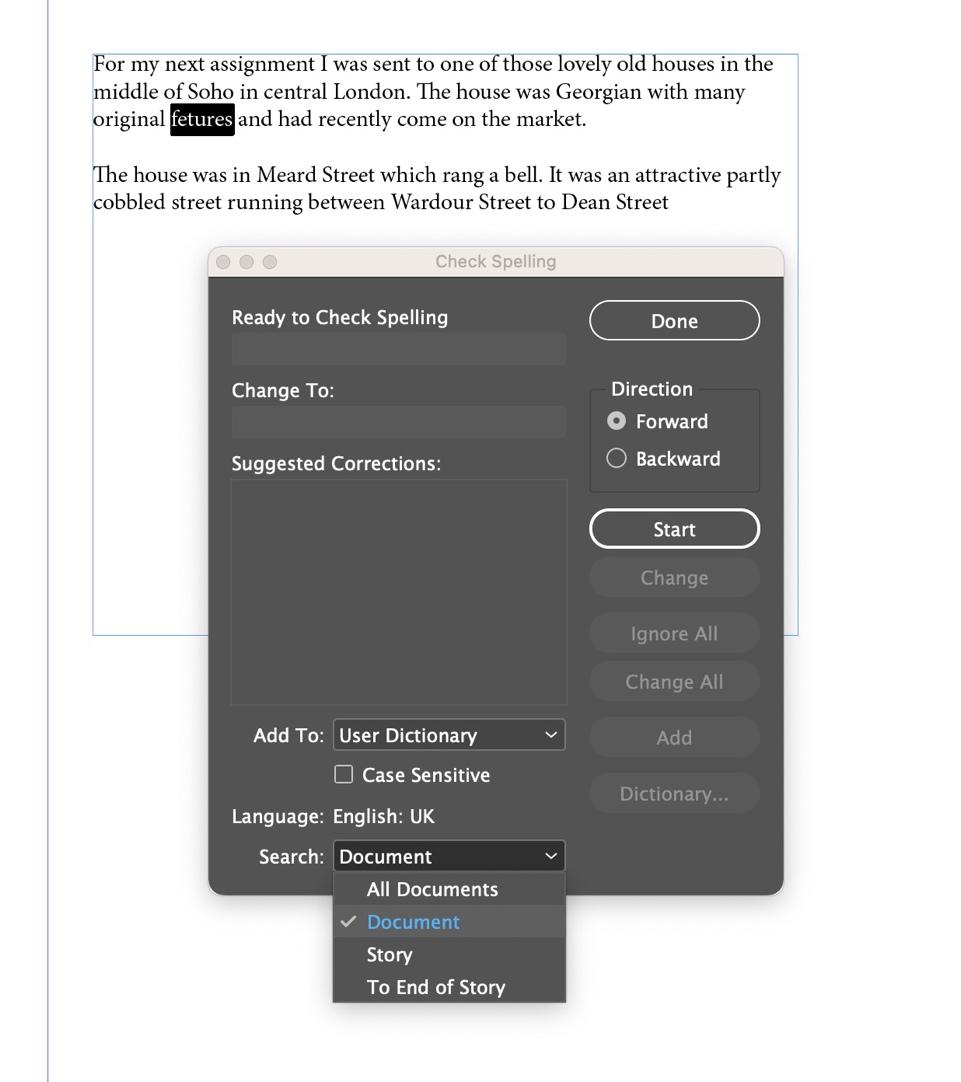
This can be pretty useful - in my experience a lot of people are not aware of this option.
Using Dynamic Spelling
If you want InDesign to check your spelling as you go along, you can use Dynamic Spelling. This highlights words that might be spelled incorrectly as you type (or import text) by underlining them in red.
If you CTRL click (Mac) or right-click (Windows) on the underlined word, InDesign will give you alternatives to choose from.
Anything that InDesign thinks might be a grammatical mistake is underlined in green.
Some people find this feature very useful, other people find it a bit of a distraction. It's entirely up to you.
You can turn Dynamic Spelling on and off by selecting it in the Edit menu like this:

Useful InDesign spelling preferences to know about
There are some useful options here you might want to explore. To choose preferences, go to
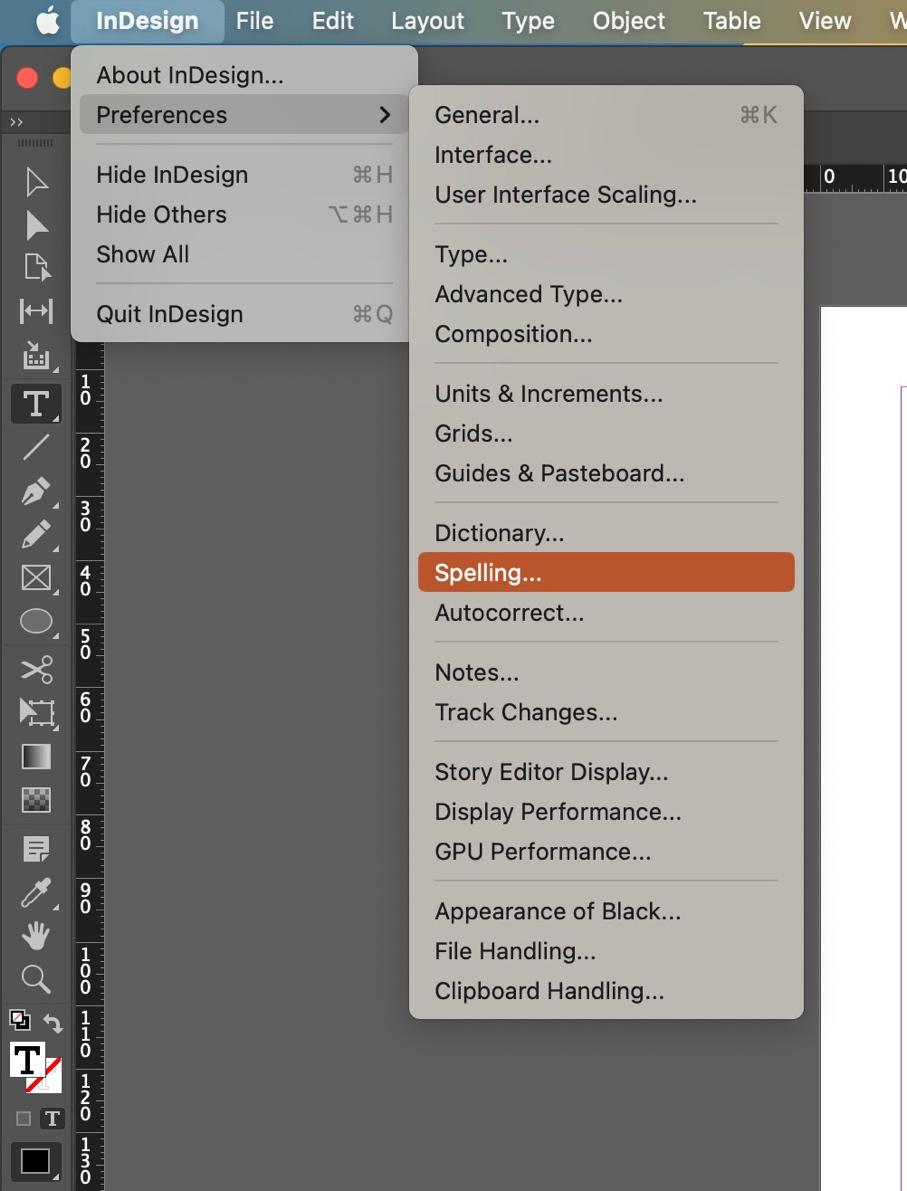
For example, if you don't want InDesign to flag up repeated words, you can turn this off. If you are producing a specialist publication that uses technical words, this option can save your sanity.
You can change the colour used to highlight misspelt words if you wish.
You can also change Dictionary preferences. This is often used to change language from the default (English: USA) to your chosen language.
You can also use this to select versions of the same language ‐ for example English: UK which will allow English spellings such as colour instead of color.
Autocorrect
Autocorrect will automatically correct any spelling mistakes as you go along.
This works in the same way as it does on your phone. InDesign will correct spelling automatically without reference to you. I would use with caution as you probably want to know what changes InDesign is making to your document…!
Conclusion
So that's it. A quick intro to checking your spelling in Adobe InDesign. It's pretty simple once you know how and it's really worth spending a bit of time making sure your spelling is on point.
There's a lot more you can do ‐ this blog has been designed to cover the essentials.
We hope you found it useful.
If you want to learn more, we run a comprehensive range of Adobe InDesign courses here at Media Training. You can find all our InDesign courses here.
Media Training is the largest Adobe Authorised Training Centre in the UK. All courses are run at our beautiful state-of-the-art training centre in central London or live online so you attend from your home or your office if that suits you better.

by Julian Woodfield