Many people struggle with adding page numbers in Adobe InDesign but it's pretty easy once you know how.
This is a simple step-by-step guide to adding page numbers to your InDesign document.
You can add page numbering during or after your document is complete.
Overview
This blog will show you:
- How to add and format page numbers in InDesign
- How page numbering works and updates itself
- What to do if you don't want a page number on your first page
- How to add sections to divide up your document
- How to use different styles for your page numbering
What you should know before you start
The first thing you should know is that page numbers are added to Parent Pages - not to individual pages in your document.
Note: Parent pages were previously known as Master Pages. Some people might still call them Master Pages - they are the same thing.
When you add page numbers to a Parent Page they automatically appear on every page in your publication that links to that parent page. This will save you a lot of time and hassle. It also makes sure your pages are automatically updated if you add or delete pages later.
Step by Step guide
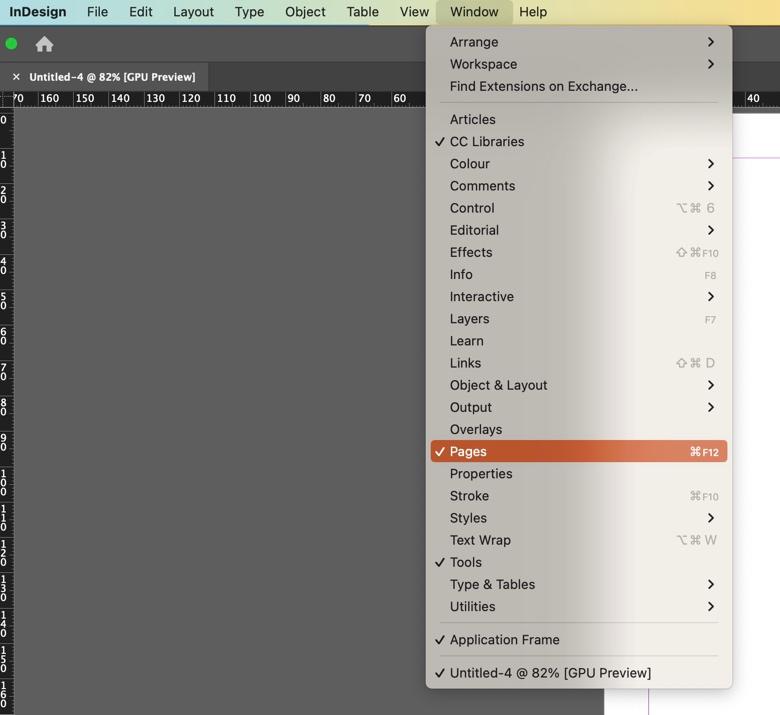
1. Go to your Pages palette in InDesign.
If you can't see it, choose Window > Pages and your Pages palette will appear.

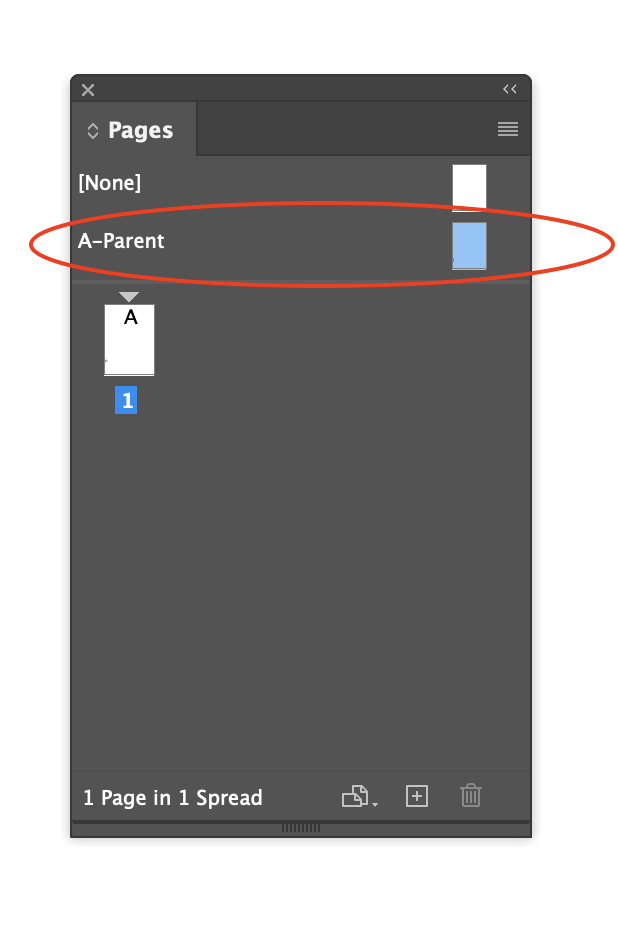
2. The Pages palette will display your Parent Page which will look like this. It's labelled A-Parent because this is Parent Page A (you can have more than one type of Parent Page. If you have more than one, they will be labelled A-Parent, B-Parent, C-Parent etc)
Double click on the Parent Page to select it.

3. Some InDesign documents are facing page documents which means the pages face each other ‐ like in a magazine or newspaper. In this case you will see a left and a right Parent Page in the Pages palette and you will need to add a page number to both the left and right Parent page.
4. Choose T (the Text tool) and draw a small box on Parent page where you want your page number to appear.
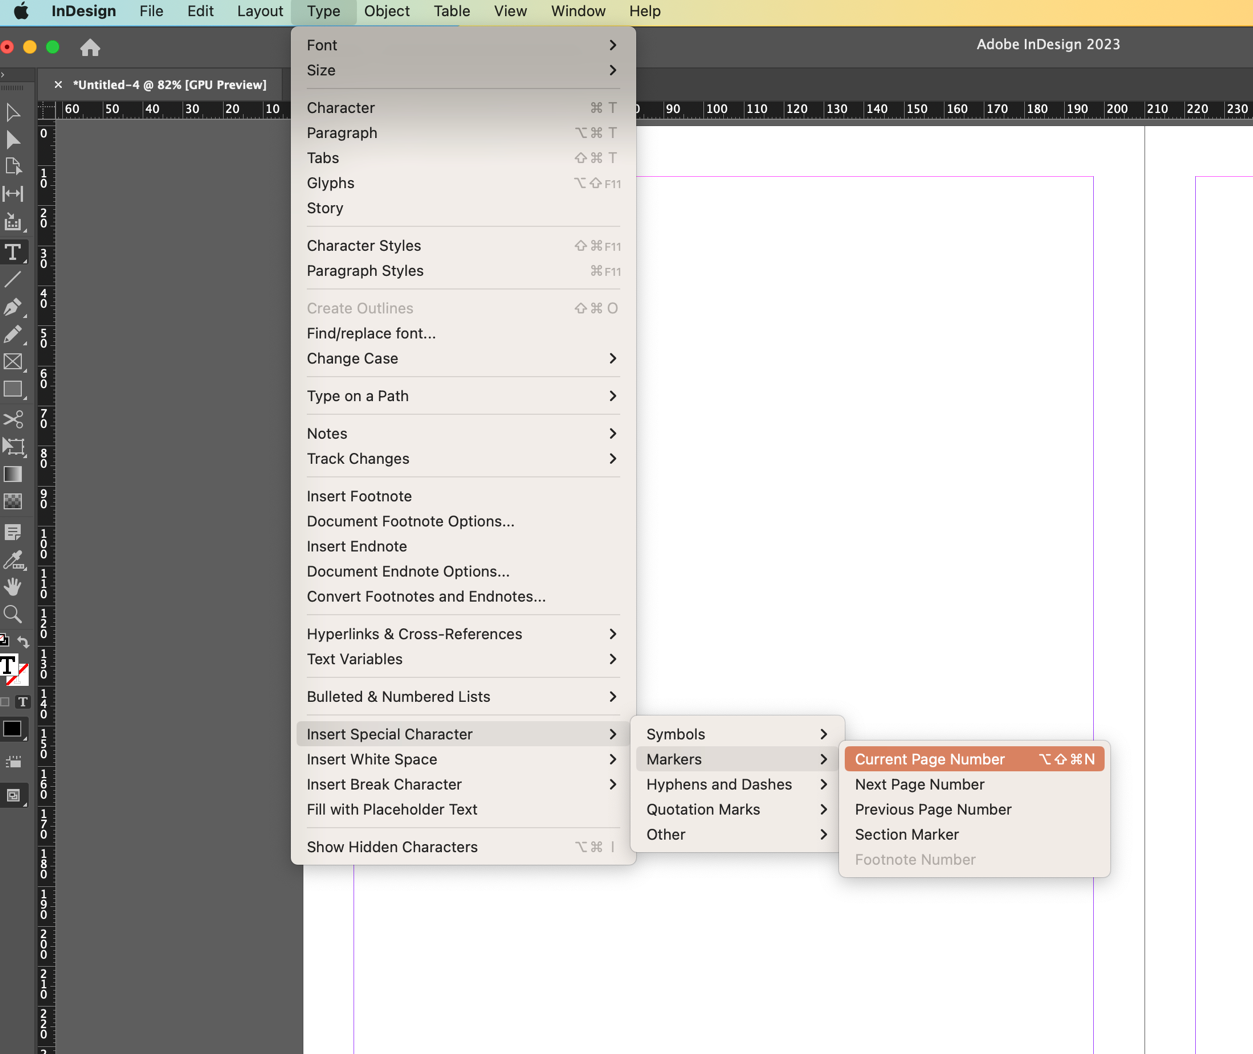
Select your text box and choose Type > Insert Special Character > Markers > Current page number

An A appears in your text box. You have now added page numbering to your Parent Page.
You can now go ahead and format the page number how you wish it to look by changing the font and font size as required.
This page numbering will automatically be applied to any pages in your document that are linked to this Parent page.
What do I do if I don't want page numbering to start on the first page?
Sometimes you don't want the first page of your document to be page 1. It might be a book cover or a magazine cover for example.
Unless you say otherwise, InDesign will automatically start page numbering from page 1. If you don't want InDesign to do this, you will need to create a new section where you want your page numbering to start.
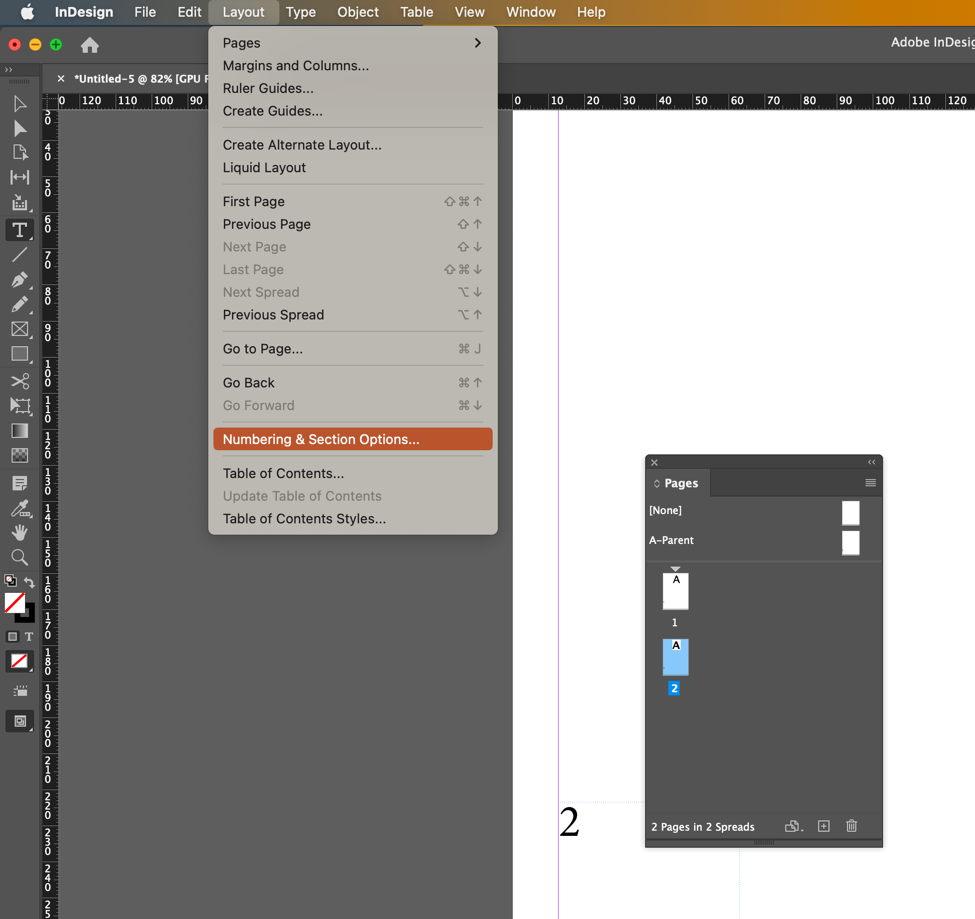
In the pages panel, choose the page you want to start a new section from. In this case we will start a new section on page 2 (remember ‐ page 1 is the cover)
In the Pages panel select page 2, then select Numbering and Section Options

In the dialog box, select Start Page Numbering and choose OK. This will change this page number to 1.

Your page 2 has now become page 1.
Job done!
How to use different styles for your page numbers.
In the same dialog box you can also change the style of your page numbering.
So instead of page 1,2,3,4 etc you can have roman numerals (I, II, III, IV) or letters (A, B, C,
D..,.) or different variations on these themes. Try a few out to see what works best for you.
Conclusion
So that's it. A quick intro to using page numbering in InDesign. Pretty straight-forward isn't it?
There's more you can do with page numbering ‐ this blog has been designed to give you the essentials to get started. We hope you found it useful.
If you want to learn more, we run a comprehensive range of Adobe InDesign courses at Media Training. You can find all our InDesign courses here.
Media Training is the largest Adobe Authorised Training Centre in the UK. All courses are run at our beautiful state-of-the-art training centre in central London or live online so you attend from your home or your office if that suits you better.
\
by Julian Woodfield